Oh my gosh, I've been a horrible blogger! I haven't kept up with this project at all. Most times when this happens it's because there's some aspect of what I'm doing that I'm not happy with. What typically follows is a period of 'contemplation.' I'm not really sure what exactly needs to change to make me happier or more satisfied with the results, but I know when I don't have it right. It's terribly frustrating and demands a level of intuitiveness that even I don't always possess.
In an effort to keep writing and damn the consequences. I've finally completed my 'Bread Project.'
I started with reading all my favorite bread-making cookbooks like the Fleishmann's Yeast book, The LaBrea Bakery Bread book and The Bread Bible.
God knows how I decided what pieces of information to pick out of these respective books to form a cumulative approach to my bread making experiment, but somehow, I chose what I thought was rational and added them to arsenal of knowledge before I started.
What I wanted was to eventually learn the secrets to making a fabulously soft baguette with a sinfully crunchy crust or a tangy, spongy sourdough but I started with a basic white sandwich bread. Maybe a whole wheat if all went well - and it did.
I started with a mixture of flour, yeast, sugar and water then added another mixture of more flour, more yeast and a small amount of salt. I didn't mix them together but instead just let them both sit and get used to eat other for hours. Once the wet part was good and bubbly as well as about twice as big, I mixed them up.
Then I let them sit again for about 20 minutes.
Then it was time for the kneading. I've always kneaded by hand so I was hesitant to try kneading in the stand mixer. But I was inspired by the fact that I've never achieved the result that I hoped for - so why not? I let the mixer do it's thing for about seven minutes, then set the dough aside to rise.
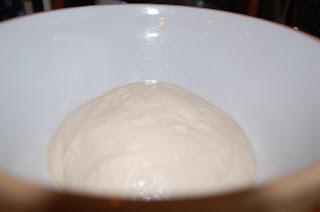
What I learned at this point is that you have to oil the bowl, the dough and everything. If a 'skin' forms from drying while the dough is rising, it will never work. As well, the oil tends to give a softer crumb to the finished bread. Let it sit for a few hours covered with a clean lightweight towel. Air conditioning and rising don't mix. Once the dough is doubled, don't 'punch it down' as directed in many guides. Simply take the dough out of the bowl and flatten it as slightly as possible. Fold it like you would a business letter twice. Once in each direction. Return it to the bowl and let it alone again. An hour or so should do the trick.
At this point you can form your bread. For this experiment, I was making a 'hearth bread' which is a free form loaf. To do this, I simply folded my dough again and then tucked the sides under as many times as required to make it look like a ball and let it rise. This is the point at which you have to be sure to use oily hands. The dough cannot dry out on it's surface or it won't rise correctly.
Now is also the time to pre-heat the oven - really hot - about 475 degrees. Put an empty baking sheet pan in the bottom of the oven at the same time. Once the dough is the size that you want, you can put the dough in the oven. At this point you can slash the top or whatever you'd like to do to it to make it 'yours.'
When you put it in the oven, through about a cupful of ice cubes on the baking sheet, throw the bread in and shut the door. Don't open it. Turn the temp down to 425 after about ten minutes and don't open the door. Let the bread bake until it's done - somewhere about 20 to 30 more minutes. If you want to get really technical, use an instant thermometer and pull the bread out when the interior is about 210 degrees.
Let it cool. It's hard to resist the temptation of cutting into it and slathering your bread with butter, but if you can wait, it will be better. Only about 20 minutes should do the trick.
Enjoy!


No comments:
Post a Comment